WordPress Self-Service Migration Tool
Transferring your WordPress site to HostGator has never been simpler. Thanks to a robust new integration with InstaWP, users can now migrate their websites from other hosting platforms with ease. This dedicated HostGator plugin—powered by InstaWP’s cutting-edge migration technology—delivers a streamlined, intuitive experience that minimizes complexity, enhances reliability, and ensures users receive comprehensive support every step of the way. What This Guide Covers:
- Key Benefits
- Migration Process Overview
- How to Migrate an Existing WordPress Site
- How to Migrate to a New WordPress Installation
- Important Notes
Key Benefits
- Reduced Complexity : The plugin features an intuitive, user-friendly interface that significantly reduces the need for technical expertise, making the migration process accessible to users of all skill levels.
- Seamless User Experience : Effortlessly migrate your WordPress sites while enhancing user satisfaction and streamlining the overall experience.
- High Success Rate : We remain committed to maintaining a migration success rate of at least 85%, in alignment with the performance benchmarks set by our partner team.
- Enhanced Customer Support : We provide dedicated manual support to resolve complex migration issues that extend beyond the scope of standard HostGator support services.
By implementing this solution, we empower our customers with a smooth and efficient WordPress migration experience, minimizing technical barriers and maximizing success rates.
Migration Process Overview
There are two primary ways to migrate your site:
- Migrate an existing WordPress site from another hosting provider.
- Create a new WordPress site and import content from an existing site afterward.
Both processes use the InstaWP-powered plugin for a fast and reliable transfer.
How to Migrate an Existing WordPress Site
-
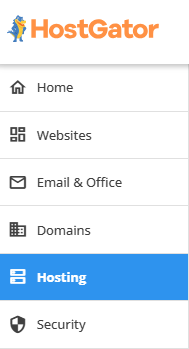
Click the Hosting tab from the left navigation menu.
-
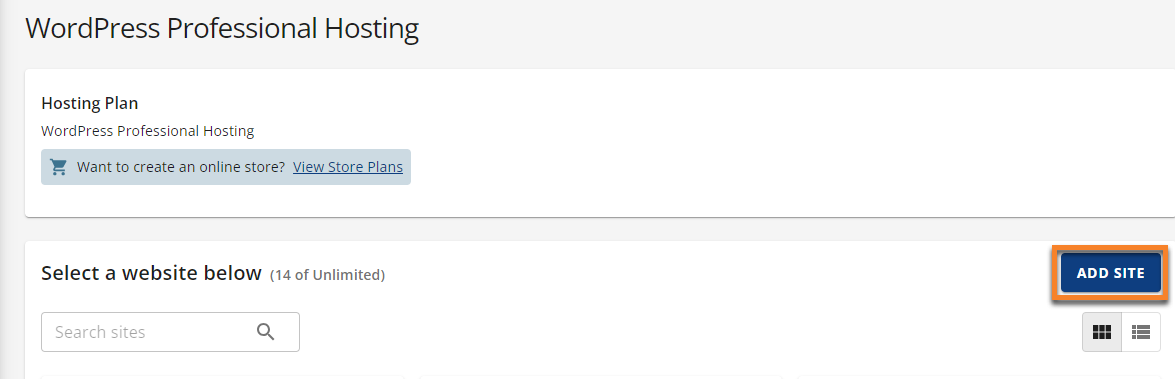
Click the ADD SITE button.
-
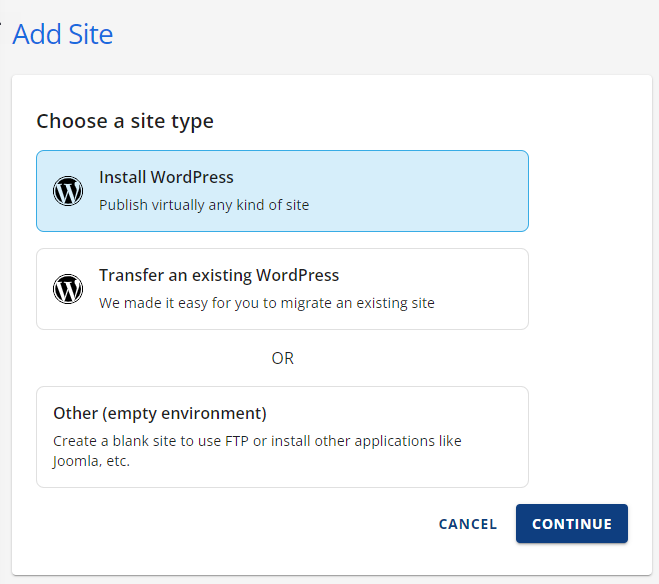
Under the Add Site section, follow the steps below:
-
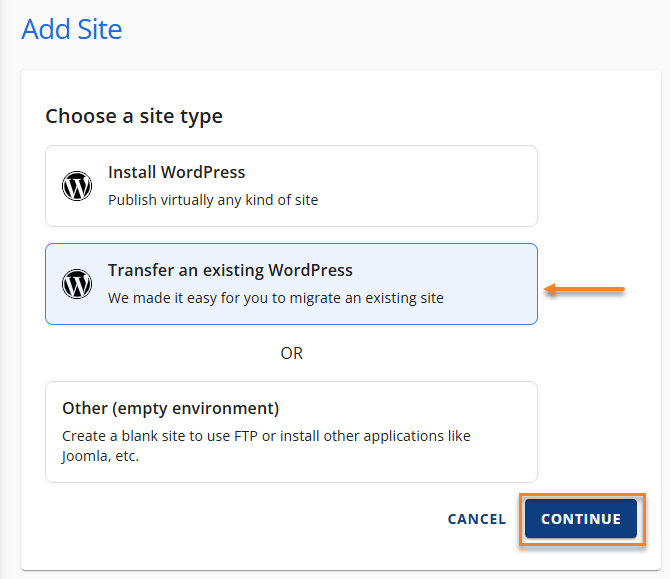
Select the Transfer an existing WordPress option.
-
Click CONTINUE.
-
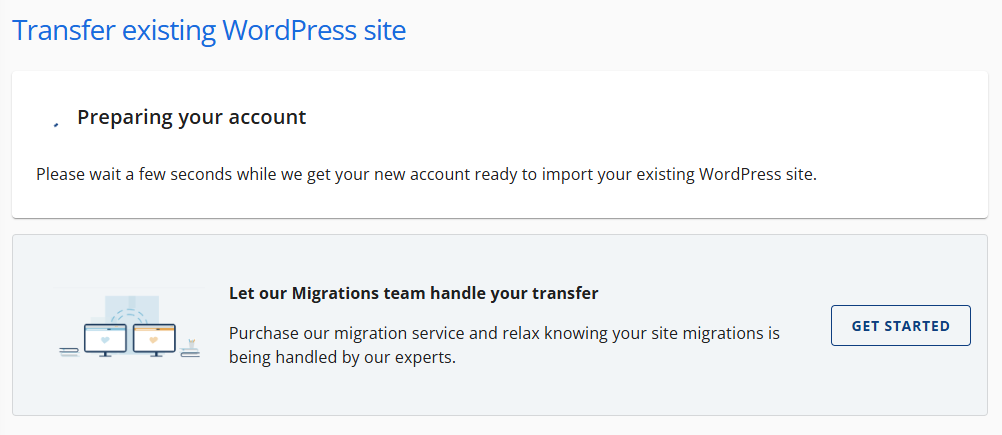
The system will prepare your account for the transfer process. Wait until you see the prompt that your account is ready to start the transfer.
-
Once ready, click START TRANSFER.

-
Connect and install the Insta WP Migration plugin.
-
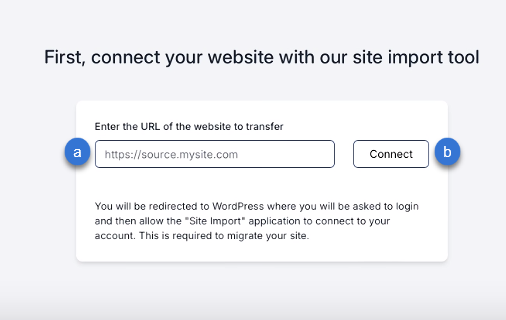
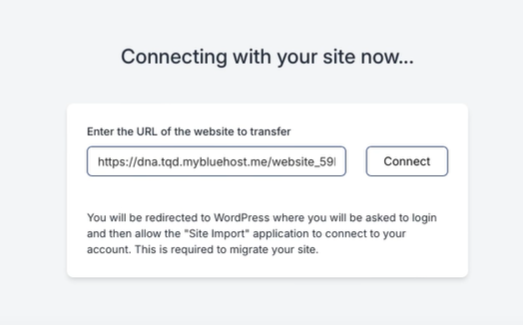
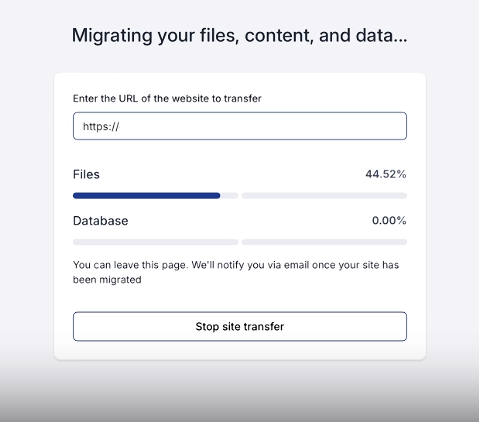
Enter the URL of the website to transfer in the https://source.mysite.com text field.
-
Click Connect.
-
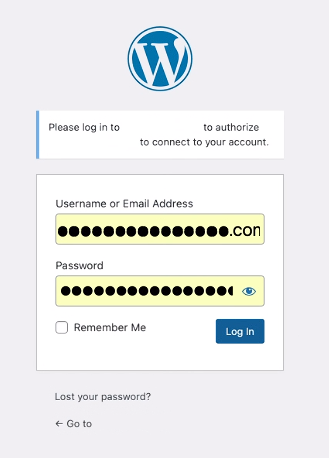
Log in to the existing website you wish to authorize and migrate to your account.
-
Enter the Username/Email Address.
-
Enter the Password.
-
Click the Log in button.
-
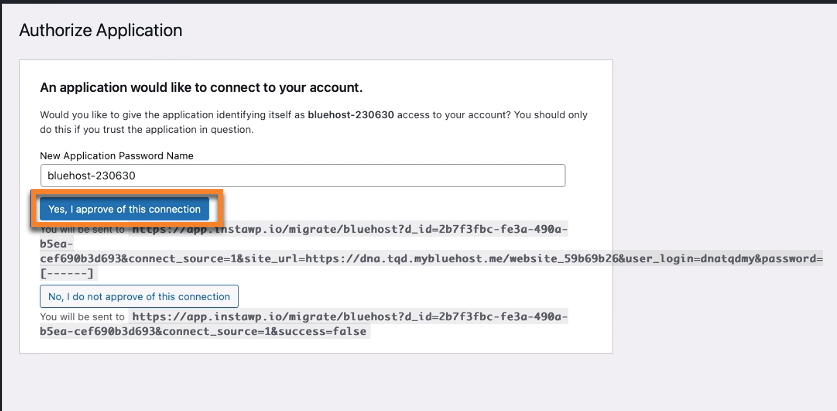
After logging in, click Yes, I approve of this connection.
-
The AI tool will copy the files, content, and databases once the Insta WP Migration Plugin has been connected and installed.
Once the migration is complete, you will see the Your migration is complete prompt.
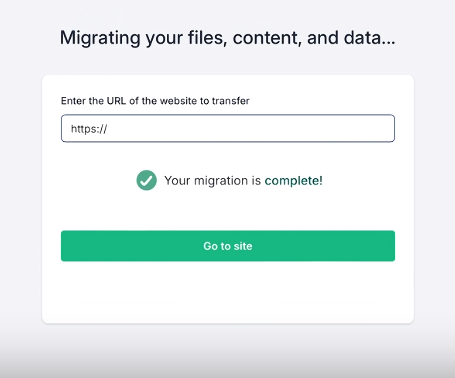 6. Lastly, click the Go to site button.
How to Migrate to a New WordPress Installation
-
Click the Hosting tab from the left navigation menu.
-
Click the ADD SITE button.
-
Under the Add Site section, follow the steps below:
-
Select Install WordPress , then click CONTINUE.
-
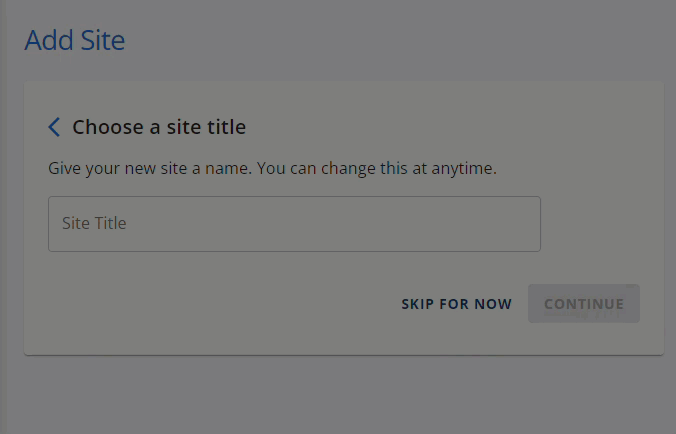
Create a name for the website, then click CONTINUE.
-
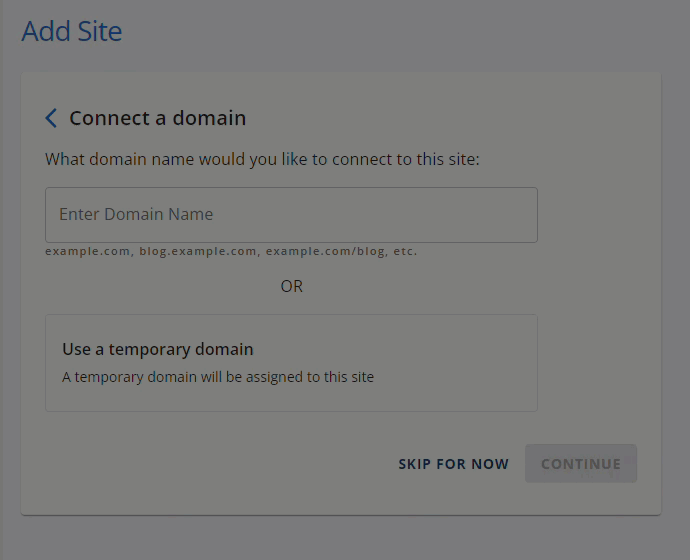
You can follow either of the steps below:
-
Type the domain name you would like to connect to the website, then click the CONTINUE button.
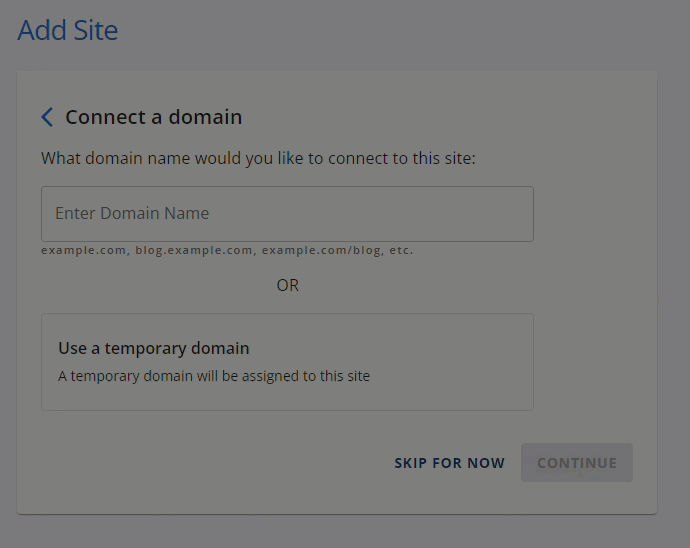
-
Use a temporary domain that the system will generate, then click the CONTINUE button.
-
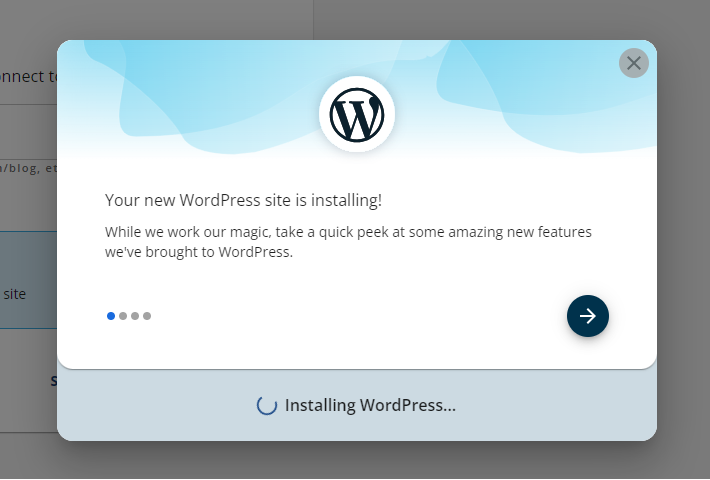
Lastly, the Your WordPress site is installing! popup will appear.
-
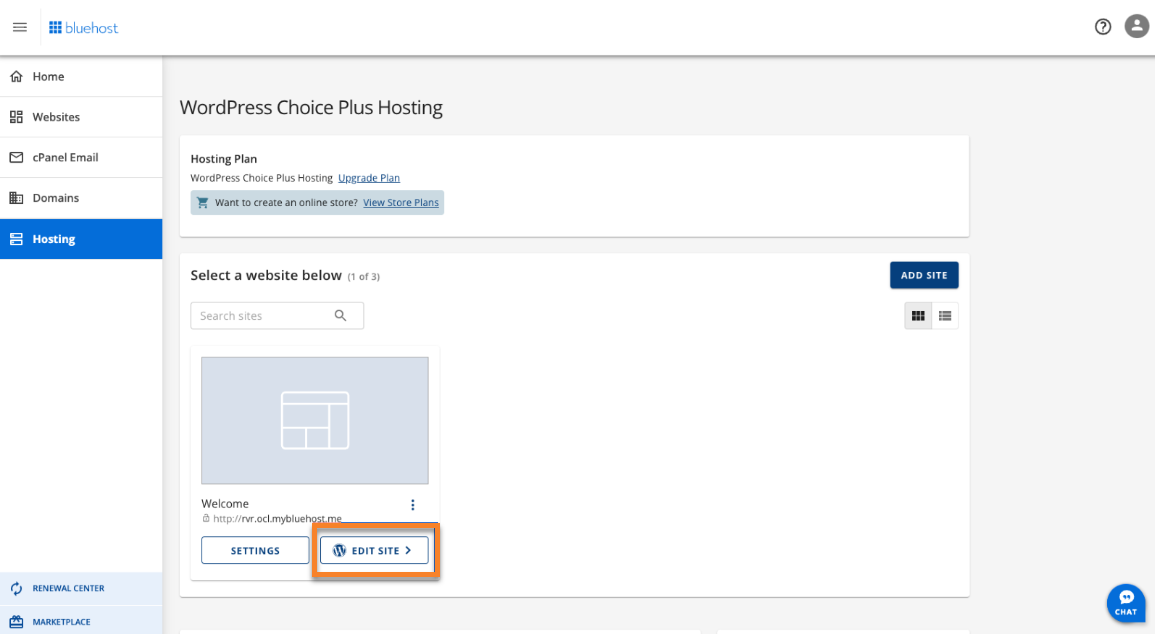
Once the installation is complete, please log in to WP via SSO (Single Sign On) by clicking the EDIT SITE button.
-
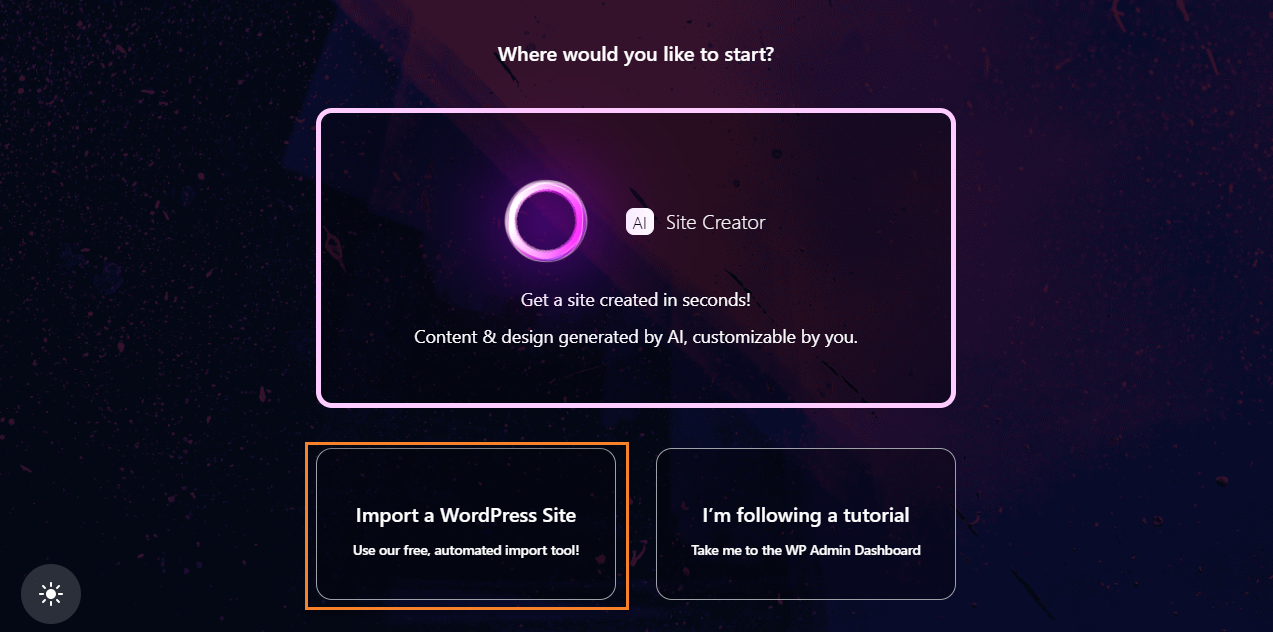
Click the Import a WordPress Site button.
-
Connect and install the Insta WP Migration plugin.
-
Enter the URL of the website to transfer in the https://source.mysite.com text field.
-
Click the Connect button.
-
Log in to the existing website you wish to authorize and migrate to your account.
-
Enter the Username/Email Address.
-
Enter the Password.
-
Click the Log in button.
-
Once logged in, click the Yes, I approve of this connection button.
-
Once the Insta WP Migration Plugin has been connected and installed, the AI tool will copy the files, content, and databases.
Once the migration is complete, you will see the Your migration is complete prompt.
9. Lastly, click the Go to site button.
Important Notes:
- The 50% mark will start the process of copying the files and database over.
- The customer has the option to close out the browser and it will continue the migration because it is not controlled by their PC.
- Customers will receive emails when the migration starts and is completed successfully or if there is a failure.
- In case of a successful migration, customers will be taken to the wp-admin dashboard, from where they can navigate to the next steps to publish their newly migrated site.
- In case of failure, customers will need to either opt for paid migration and support from the pro-services team or fill out the InstaWP support form to raise a support ticket. For self-service migration, we have monitoring in place to identify failed migrations and understand the cause. This data will be used to improve the tool to increase migration success rates over time.