W3 Total Cache WordPress Plugin
One way to optimize WordPress is to install W3 Total Cache (W3TC), which can be done from your WordPress Dashboard under Plugins. We do not recommend using W3 Total Cache while other caching plugins are enabled, as it causes numerous issues upon activation. We recommend using WP Super Cache. You can activate the plugin from the WordPress Dashboard unless you need advanced features like CDN integration or enhanced caching features. WP Super Cache is easier to configure and is lighter in weight.
How to install W3 Total Cache
- Log in to your WordPress Dashboard by going to: ``` http://example.com/wp-admin
or ```
http://example.com/wp-login.php
- Replace example.com with your actual domain name.
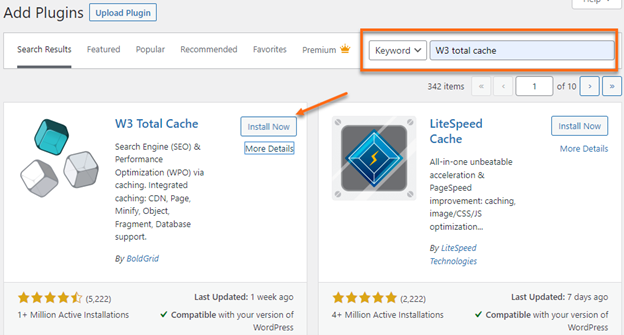
- Navigate to Plugins , then click on Add New.

- Search forW3 Total Cache , then click theInstall Now button****.****
- Click Activate.
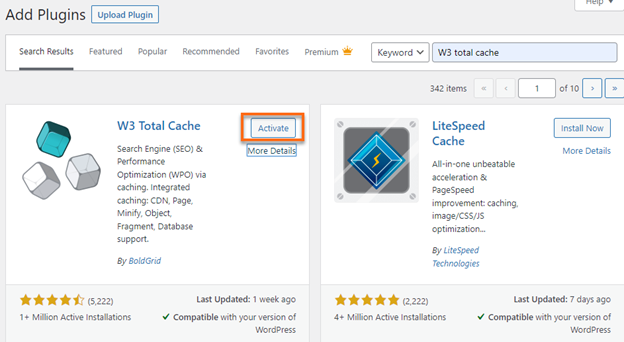
- Upon activation of the plugin, the Performance option will show on the left menu.
- Click on Performance , then go to General Settings for configuration.

Recommended Settings
- Page Cache: Enable
- Page Cache Method: Disk (Enhanced)
- Database Cache: Disabled
- Object Cache: Disabled
Other options for optimizing WordPress include WP Super Cache, an alternative to W3 Total Cache.
How to uninstall W3 Total Cache
- Log in to your WordPress Dashboard by going to: ``` http://example.com/wp-admin
or ```
http://example.com/wp-login.php
- Replace example.com with your actual domain name.
- Go to Plugins , then click onInstalled Plugins.

- LocateW3 Total Cache ,Deactivate.

- Afterward, click on the Delete link****.****

- At the confirmation for deleting the plugin, clickOK.
Need additional assistance? Please contact us via phone or chat so we can assist! HostGator's Support is here to help.