VPS or Dedicated: How to Clear the Mail Queue
Are your emails getting stuck? A mail queue issue could cause this. Clearing the mail queue on your VPS or dedicated server is actually quite simple. This article outlines the step-by-step process for clearing the mail queue.
- What You Need
- Log in through SSH
- Using Terminal (Mac, Linux)
- Using PuTTY (Windows)
- Clearing the Queue
- Stopping the Mail System
- Clearing out the Files
- Clearing out the Database
- Clearing out the Log
- Restart the Mail System
What You Need
- The root user password on your server.
- SSH clients like Terminal (Mac, Linux) or PuTTY (Windows).
- Your server's IP address or a domain name pointing to your server.
Log in through SSH
Note : To follow these instructions, you will need to know the root password for your server. However, if you don't know the root password or haven't set one up, please refer to: How to Change WHM Password.
Using Terminal (Mac, Linux)
- Open Terminal
- Run this command to log into your server via SSH:
ssh root@exampledomain.comNote: Swap exampledomain.com with your domain or IP address. - If you receive a message about the authenticity of the host, type
**yes**to continue connecting. - Enter the root password for your server when prompted. Note: As you enter your password, it's normal not to see any changes on your screen.
Using PuTTY (Windows)
You must have a compatible SSH client, such as PuTTY, to make an SSH connection on Windows. You can download PuTTY from http://www.chiark.greenend.org.uk/~sgtatham/putty/download.html.
- Open PuTTY
- Enter your domain or IP address as the hostname.
- Input 22 for the port number.
- Ensure that the Protocol is set to SSH.
- Select the Open button.
- If you receive a message about the authenticity of the host, type
**yes**to continue connecting. - When prompted for the username, type
**root**. - When prompted for the password, enter the root user's password. It's normal not to see anything change on the screen as you enter your password.
Clearing the Queue
When logged into SSH with root access, you will need to run a few commands to clear the queued mail files and the mail database.
Stopping the Mail System
It's a good idea to stop the mail system before clearing out the queue, as it will take the mail system offline while you clean it up. Enter the following command to stop the mail service:
service exim stop

Clearing out the Files
Once exim has stopped, use the following command to clear out the mail files:
exim -bp | awk '{print $3}' | xargs exim -Mrm - removing *
This command might take a while to complete if you have a large queue. You will not be provided any progress indicator, but you will see a list of the messages as they are being removed. You will know it's completed when the command prompt returns.
Clearing out the Database
- Stop the tailwatchd service by running this command:
/scripts/restartsrv_tailwatchd --stop
2. Then, stop the eximstats by running the command:
/scripts/restartsrv_eximstats --stop
3. Enter the following command to remove the mail stats database:
find /var/cpanel -name 'eximstats_db*' -exec rm {} +
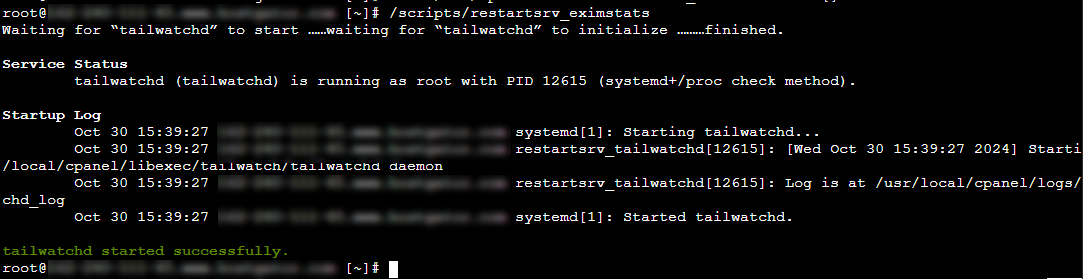
![]() 4. Run this command to restart the eximstats and recreate the mail stats database:
4. Run this command to restart the eximstats and recreate the mail stats database:
/scripts/restartsrv_eximstats
 5. Finally, enter this command:
/scripts/restartsrv_tailwatchd --start
Clearing out the Log
Clearing out the log will reduce the file count, which may have increased as a result of the excessively large mail queue. This is essential because keeping your file count lower will help your server perform better.
- Run the following command to clear out the log:
rm -rf /var/spool/exim/msglog/*
Restart The Mail System
Run the following command to start the mail system again.
service exim restart
 When the mail system starts, you will be finished clearing the queue.