How Do I Update the PHP Version on my Site?
- Overview
- Available PHP Versions
- How to Update PHP
- Fix MultiPHP Error
- php.ini
- Limits
- View Settings
Suppose you ever encounter problems with how your server handles PHP packages or find WordPress requesting that you upgrade your PHP version. In that case, knowing how to view and modify your server's PHP is helpful. Updating your site's PHP version is vital for its security. The latest security patches will be implemented whenever a new PHP version is released. This article discusses a few options for upgrading the PHP version of your hosting account. What You Should Know
- The minimum PHP version on our Shared hosting servers is currently at 8.1.
- In January 2024, PHP version 8.3 became available as an option.
- We removed PHP 7.4 from the MultiPHP Manager options as we upgraded and improved our servers. We recommend upgrading all your website installations and applications to be compatible with the newest PHP version available in your account.
- Please be aware that PHP versions older than 7.4 will no longer be supported as we upgrade accounts. If your website must use an older PHP version, you can do this manually. Please remember that using an older PHP version exposes your website to unpatched security vulnerabilities.
How to Update a Site's PHP Version
Follow the instructions below to update the PHP version of your website.
- Via the Customer Portal ⤵
- Via cPanel's MultiPHP Manager ⤵
Via the Customer Portal
- Log in to your Customer Portal.
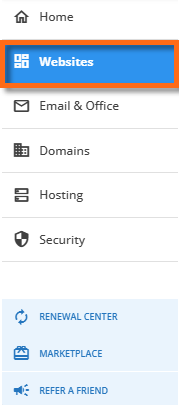
- Click Websites on the left-hand menu.
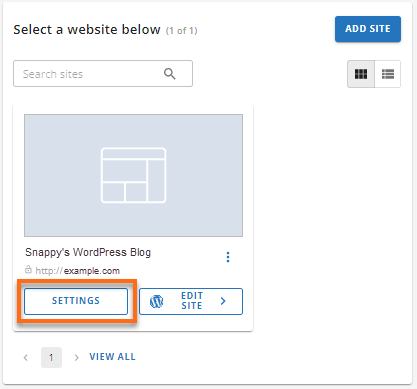
- Look for the website with the PHP version you want to manage. Click its Settings button.
- Click the Settings tab.

- Scroll down to the PHP Version section and click the Change PHP Version button.

- Select the PHP version from the dropdown.
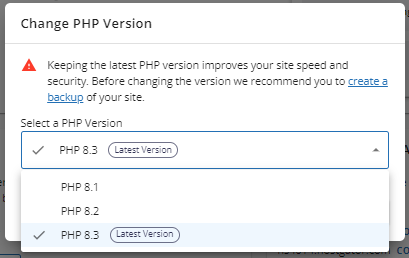
- Click Apply.
- A notification will pop up, notifying you about the successful change of the PHP version.

Via cPanel's MultiPHP Manager
- Log in to cPanel directly or access cPanel via your Customer Portal.
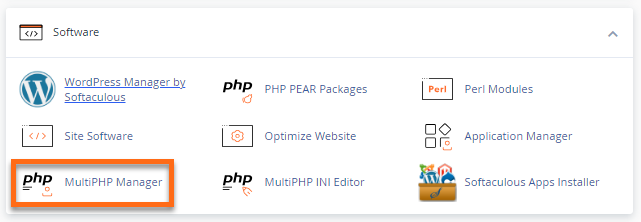
- Within cPanel, click MultiPHP Manager under the Software section.
- Select the domain you want to manage.
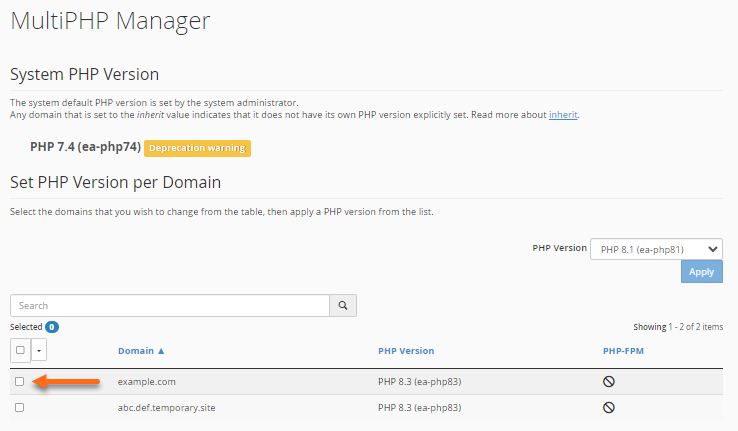
- Select the PHP version from the dropdown, then click Apply.
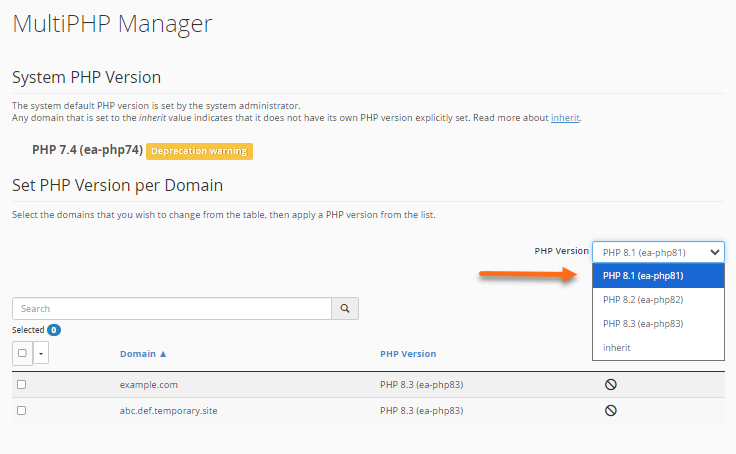
- A notification will pop up, notifying you that the change was successful.

Click here to view How to Update PHP Version in cPanel (Video) Here is a video to help you update the PHP version with your cPanel The video above may look slightly different from our current cPanel layout. However, the functionality described will be similar.
If you previously used the PHP Selector to change your PHP version, there may be a handler in your .htaccess file that needs to be removed, similar to this one:
Use PHPedge as default
AddHandler application/x-httpd-php-edge .php
<IfModule mod_suphp.c>
suPHP_ConfigPath /opt/phpedge/lib
</IfModule>
For specific instructions on fixing Missing MySQL Extension errors, please refer to our support article How to Fix Error After MultiPHP upgrade. Need further assistance? Please contact HostGator Support via phone or chat, and we will be happy to assist you!